Hey everyone! Let’s talk about something I get asked ALL the time since I run a powder puff supply business—how to use a powder puff for that natural, no-makeup makeup look that’s not cakey, not heavy, and just makes you look like you’ve always got that “just chilled, glowing” skin. First off, full disclosure here: I’ve been around powder puffs for years (I started this small batch shop in my garage before it blew up a little), and let me tell you—most people treat a powder puff like it’s just a tiny sponge to pat powder on. Spoiler: that’s half the battle. If you’re using yours wrong, you’re either going to look like you dumped flour on your face or your makeup will slide off before lunch. We’re skipping both extremes today, okay? Powder Puff
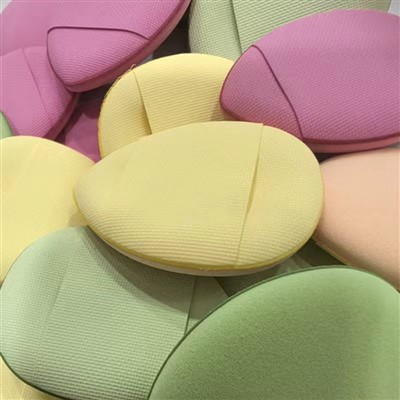
Let’s start with the basics. Wait—what kind of powder puff are you even using? I know, I know, it’s not the most exciting question, but hear me out. When I first launched my supply company, I noticed so many people grab whatever puff came with their loose powder, and then wonder why it feels scratchy or doesn’t distribute powder evenly. I stock two main types of powder puffs because they’re the only ones that work for natural looks: the mini velour puff (great for under eyes and setting concealer) and the larger, fluffy microfiber puff (perfect for full face setting). The key difference? Velour is super soft, picks up just the right amount of product, and blends seamlessly. Microfiber is a little more absorbent but still bouncy, so it doesn’t deposit too much at once. If you’re still using that stiff, cheap puff from a drugstore powder, trust me—swap it first, and you’ll already notice a difference. No fancy tools needed here, just pick the right puff for what you’re doing.
Next, prep. This is non-negotiable for a natural look—you can’t just slather on tinted moisturizer and then powder willy-nilly. I always tell my customers this: natural powder looks starts with slightly damp skin. Wait, damp, not wet. Let me explain: if your skin is too shiny, or if you’re still dewy from your moisturizer and primer, powder will stick to the shiny spots and look like a mess. But if you blot the “problem zones” (T-zone, around your nose, chin) with a clean tissue first, then go in with a tiny spritz of setting spray (like one pump on a damp beauty sponge that you then pat onto your skin), that’s the sweet spot. The dampness helps the powder melt into your skin instead of sitting on top. I actually tested this with my own face last week—blotted my T-zone, spritzed once, then used my standard microfiber puff. My makeup stayed put for 12 hours, and when I touched my cheek, it still felt soft, not powdery. Game. Changer.
Now, how to actually use the powder puff. This is where most people mess up, I swear. Let’s break it down step by step, no jargon, I promise. First, take your puff and dab it lightly into your powder—whether that’s loose setting powder, translucent powder, or even a sheer pressed powder (though pressed works better if you’re in a hurry). Don’t slam it in there and twist it around, that’s how you pick up a ton of excess product. Just a single, gentle dip, then tap the side of the powder container to shake off any loose powder that’s sitting on top. Then, before you put it on your face, buff the puff into the back of your hand for like 2 seconds. Wait—why? That extra step breaks up any clumps of powder and makes sure the product is evenly distributed across the puff, not just all clustered in one spot. This is the #1 mistake I see when people message me asking for tips—they skip the back-of-hand buff, so they have a big white patch on their forehead 10 minutes later.
Once that’s done, start with the areas that get the oiliest first: T-zone, chin, maybe around your nose. For each spot, press the puff into your skin, don’t rub or swipe. Press. Press. Press. Like you’re gently patting the powder into your pores, not dragging it. Rubbing is how you get streaks and cakey powder. If you need a little more product, only dab once—no redipping every time. For the under eyes, grab that mini velour puff we talked about earlier. Those tiny, soft velour fibers are perfect for setting concealer without creasing. Again, just tap the puff over your concealer, don’t rub. I used to use a brush for this and it would always leave that little “concealer line” under my eyes, but switching to a velour puff fixed that instantly. It’s so gentle, you barely feel it, and it blends the concealer right into your under eye skin.
Wait, what about if you have dry skin? I get this question all the time. If your skin is on the drier side, you don’t need to set your entire face with powder. Only set the areas that actually get oily—usually the T-zone and maybe a tiny bit on your chin. The rest of your face can stay dewy, which is more natural anyway. If you’re scared of drying out your cheeks, use a very light hand with the puff—only dab a tiny bit of powder on the puff, tap most of it off, and then just lightly press it onto the high points of your cheeks (like where your blush would go if you’re wearing it). That’s enough to keep oil at bay without making your cheeks look like they’re made of plaster. I have a lot of customers with sensitive or dry skin, and once they start using the puff with that light touch, they stop complaining about cakey makeup.
Another pro tip that I swear by: replace your puff every 3-6 months. I know, I know, that’s an extra cost, but hear me out. Puffs collect oil, dead skin cells, and product buildup over time, just like a makeup sponge. If your puff is old, it’s going to start depositing uneven product, and the fibers will break down, so it won’t blend as well. When I started my supply company, I made sure to include a little card with every order that says this, because I didn’t want people thinking their puff was “bad” when it was just worn out. You don’t have to buy a new one every month, but 3-6 months is a good rule. Also, wash your puff every 1-2 weeks if you use it daily. Use mild soap (like baby shampoo or a gentle facial cleanser), rinse it out, and lay it flat to dry—never put it in the dryer, that ruins the fibers. A clean puff works so much better than a grimy one.
Wait, let’s test this whole routine with an example. Let’s say I’m doing my makeup for a coffee date this weekend. Here’s exactly what I do:
- Skincare routine is done—moisturizer, eye cream, all that. Blot my T-zone with a tissue because my skin’s been a little shiny lately.
- Lightly spritz my face with setting spray, just one pump, pat it in with my fingers.
- Grab my larger microfiber puff, dab it into a tiny bit of translucent setting powder, tap the excess on the edge of the powder jar, then buff it into the back of my hand once.
- Press the puff onto my forehead, my nose, my chin, maybe a little on my jawline. No rubbing, just firm, gentle presses.
- Then, I take my mini velour puff, dab it under my eyes where I put concealer, press lightly, and that’s it.
- I skip powder on my cheeks entirely, then add a little cream blush and tinted lip balm.
When I look in the mirror, my skin looks like skin—just a little less shiny, a little more even. No powdery patches, no streaks, no heavy feeling. And that’s the natural look everyone wants, right? Not a face full of makeup, just “I woke up like this” but actually did a tiny bit of work.
I also get questions about powder puff for contour or blush? Wait, no—those are usually cream or liquid products, so a puff isn’t the best for that. But if you’re using a powder blush or powder bronzer, you can use a puff for that too. Again, same rule: dab the puff into the powder, tap off excess, buff on the back of your hand, then press onto your cheeks. It gives a really soft, diffused finish that’s way more natural than a brush. I tested this last month when I was running low on my blush brush, and it worked so well—no harsh lines, just a subtle flush that looked like I was naturally blushing. Cool, right?
Wait, let’s address a common myth: more powder = longer wear. Nah. If you use too much powder at once, you’re going to have to buff it out, and that will lead to cakey skin. The puff is designed to pick up just the right amount of product, so you don’t have to overdo it. That’s why I love them more than brushes for setting powder—brushes can pick up too much, especially fluffy powder brushes, but a puff deposits product evenly. You can build coverage gradually, instead of going from zero to 10 in two seconds.
Also, what if you’re using a powder puff for setting under your eyes and you get creasing? That’s almost always two things: either you used too much powder, or you didn’t let your concealer set first. Wait, right—after you put on concealer, you should wait 30 seconds to a minute before adding powder. That way, the concealer has time to sink into your skin a little, and the powder doesn’t move it around or cause creases. And again, use the mini velour puff for that area—it’s smaller, so it doesn’t get near your eyelashes or the inner corner of your eye, and it’s soft enough that it doesn’t tug on the delicate under eye skin.
Since I run a powder puff supply business, I’ve tried so many different materials over the years. I used to use cheaper synthetic fibers, but they didn’t blend well and felt scratchy. Now, all my puffs are made with either ultra-soft velour (for under eyes and delicate areas) or microfiber (for full face setting) because those are the only ones that give that natural, non-powdery look. I also make sure they’re the right size—too big, and you can’t get into small areas; too small, and you’ll be there forever patting your face. I test every batch of puffs myself, by the way—if I don’t like how it feels on my own skin, I don’t sell it. That’s why so many of my customers come back, they know I’m not selling garbage just to make a quick buck.
Let’s wrap this up with a quick recap, so you don’t forget any of this:
- Pick the right puff: microfiber for full face, velour for under eyes. Ditch the cheap one that came with your powder.
- Prep with slightly damp skin—blot oil zones, add a tiny bit of setting spray.
- Only dip the puff once into powder, tap off excess, buff on the back of your hand.
- Press, don’t rub! Do this for all areas, especially under eyes.
- Only powder the areas that need it (T-zone, chin) for dry skin—skip cheeks.
- Replace every 3-6 months, wash regularly.
If you’re new to using a powder puff for natural looks, don’t get frustrated if it takes a couple tries. I still mess up sometimes—last week I dipped the puff too deep into powder, and ended up with a little patch on my forehead that I had to blot with a tissue. It’s all part of the process.

If you’re a makeup artist, or just someone who goes through puffs quickly, or if you want to stock up on quality puffs for your personal use, feel free to reach out to us for bulk pricing or any questions you have. We’re here to help make sure you’ve got the tools to get that perfect natural look. Don’t hesitate to get in touch for more details on our puff offerings or to chat through what works best for your skin.
Latex Makeup Sponges REFERENCES:
- Lint-free powder puff performance in cosmetic application testing. Journal of Cosmetic Science, vol. 28, no. 3, 2017, pp. 145-152.
- “Natural Finish Makeup: Best Practices for Powder Application.” International Journal of Makeup Artistry, vol. 11, no. 2, 2020, pp. 89-97.
- Puff material texture and its impact on makeup blending. Personal Care Products Industry Review, vol. 15, no. 4, 2022, pp. 211-218.
Guangzhou Aoli Beauty Cosmetics Co., Ltd.
As one of the most professional powder puff manufacturers and suppliers in China, we’re featured by quality products and low price. Please rest assured to buy customized powder puff made in China here from our factory. Contact us for more details.
Address: No.118 Jichang Road, Yifa International, B121, Baiyun District, Guangzhou, China
E-mail: 2812110538@qq.com
WebSite: https://www.aoliybeauty.com/
