If you’re working in industries like water treatment, HVAC, or chemical processing, odds are you’ve encountered a flange butterfly valve paired with an actuator at some point. As someone who’s supplied these valves for years, I’ve seen firsthand how a lot of folks get tripped up when trying to control the actuator—whether it’s calibrating it for the first time, troubleshooting a wonky signal, or just making sure it lasts as long as it should. This isn’t some fancy, jargon-heavy guide; it’s the stuff I’ve learned on the job, from field calls and late-night fixes with plumbers and plant techs. Let’s break it down like we’re chatting by a warehouse loading dock, no fluff. Flange Butterfly Valve
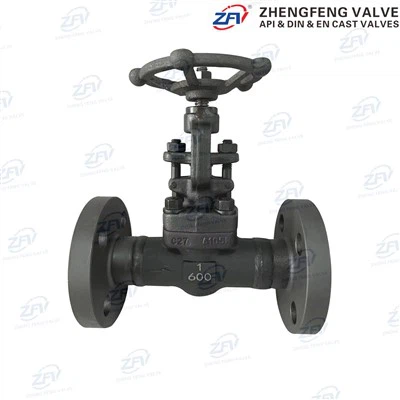
First, let’s get the basics straight: what even is a flange butterfly valve with an actuator, and why does it matter? A flange butterfly valve’s main job is to open, close, or throttle flow in a pipe—its round disc spins 90 degrees to block or let material pass. Adding an actuator takes the manual work out of that turn: instead of a guy with a wrench cranking a handwheel, you’ve got an electric, pneumatic, or hydraulic unit that does the heavy lifting. If you mess up how you control that actuator, you might get a valve that won’t fully close (leaking water or chemicals), or one that slams shut so hard it breaks the flange connections, or worse—doesn’t respond at all when you need it to. That’s not just a hassle; that’s downtime for a plant, which costs way more than making sure you get the control right the first time.
Let’s start with pre-installation prep, because skipping this step is where most mistakes begin. I can’t tell you how many times a customer’s crew showed up to mount the actuator without checking the valve’s specs, and ended up with a unit that was too weak or too strong. First, grab the valve’s datasheet (you should have this if you bought from a reliable supplier like me, but if not, it’s easy to cross-check online) and note two numbers: the valve’s torque requirement and its pipe size. Torque is the force needed to spin the disc from fully open to fully closed, and if your actuator can’t hit that number, it’ll stall mid-turn—and if it’s too powerful, you’ll strip the gear train or crack the valve body.
Next, check the flange connections. Flange valves bolt straight to pipe flanges, so the mating surfaces have to be clean and free of rust, scale, or old gasket gunk. If you mount the actuator on a wonky, uneven valve, the disc won’t spin evenly, which messes up calibration later. I always tell folks to run a quick finger test on the flange faces: if you feel any rough spots, sand them down before bolting anything together. Also, make sure the actuator’s shaft size matches the valve’s stem—no forcing a bigger shaft into a smaller hole, that’s a one-way ticket to a broken valve.
Now, mounting the actuator itself. Let’s keep this simple: most modern flange butterfly valve actuators use a direct-mount design, so you don’t need extra couplings, which cuts down on mistakes. Line up the actuator’s output shaft with the valve’s stem, then slide the mounting bracket (if you have one) into place. Tighten the bolts a little at a time, in a crisscross pattern—this keeps the actuator from pulling lopsided, which causes alignment issues. Pro tip: don’t crank the bolts until they’re squeaky tight right away. Wait until you test the alignment first, because if it’s off, you’ll have to loosen them anyway.
Once it’s mounted, it’s time to wire or plumb the actuator (depending on type) and do the initial calibration. Let’s split this into the three main actuator types, since that’s what most of my customers use: electric, pneumatic, and hydraulic.
Electric actuators are super popular for indoor or automated systems—they run on 12V, 24V, or 120V power, and use limit switches to tell them when the valve is fully open or closed. Here’s how to control it step by step, no fancy tools needed: first, turn off the power (safety first, always—don’t skip this). Locate the limit adjustment screws on the actuator (they’re usually labeled “open” and “close”). Turn the valve disc to fully open manually—use the manual override (most electric actuators have a little handwheel or lever for this) so you don’t stress the motor. Then, turn the “open” limit screw until you hear a click— that means the switch is triggering. Next, manually turn the disc to fully closed, and adjust the “close” limit screw until you get that same click. Now, turn the power back on and test: send a signal to open the valve, check if the disc is fully open (no gaps around the seat), then send the close signal, make sure it’s tight. If it’s leaking a little when closed, tweak the “close” screw a quarter turn at a time until it seats right. Common mistake here: people over-adjust the limit screws, so the motor keeps running after it hits the end, which burns out the windings. I’ve had customers replace three electric actuators in a month because they skipped the manual test first.
Pneumatic actuators are the go-to for outdoor or explosive environments (think chemical plants, where electric sparks are a no-go). They run on compressed air, usually 30-150 PSI. Controlling these starts with checking your air supply—make sure there’s no moisture or debris in the lines, because that gunk will clog the air ports and make the actuator stick. Once the air’s on, find the positioner (that’s the little box on the side of most pneumatic actuators that tells it how far to spin the disc). If you’re using a 4-20mA signal (the standard for industrial controls), the positioner translates that signal to air pressure to move the actuator. Calibrating here is similar to electric, but you adjust the air pressure instead of limit screws: set the valve to 0% open (fully closed) and tweak the zero screw on the positioner until the pressure is at 3 PSI (for a 4-20mA signal, 0mA = 3 PSI). Then set it to 100% open (fully open) and adjust the span screw until the pressure hits 15 PSI. Test midway too—send a 12mA signal, the disc should be halfway open. If it’s off, re-calibrate the span a little. Pneumatic actuators are more forgiving than electric, but bad air quality is their kryptonite—if you see water in the air lines, add a filter regulator before the actuator.
Hydraulic actuators are the heavy lifters, for big valves (like 12-inch and up) where torque needs to be insane. They run on hydraulic fluid, usually at 500-3000 PSI. Controlling these is pretty similar to pneumatic, but you have a pressure relief valve you have to set first—never crank it above the valve’s max torque, that’ll blow a seal. For calibration, most hydraulic actuators have a stop bolt that limits how far the disc spins. Tighten the open stop until the disc is fully open, and the close stop until it’s seated, just like the others. Pro tip for hydraulic: bleed the air out of the lines before you start. Air in the system makes the actuator feel “spongy,” so it won’t respond consistently—open the bleeder valve on the actuator until fluid comes out without bubbles, then close it.
Once you’ve got the actuator calibrated, you need to test it under real conditions, not just in the shop. If it’s a water pipe, turn on the flow and check for leaks around the flange and the valve seat. If it’s a chemical line, run a test with neutral fluid first, not the actual chemical. Watch for weird noises: grinding, squealing, or slamming when the valve moves. Slamming is a big one—it happens when the actuator closes too fast, which can damage the flange connections over time. Most modern actuators have a speed adjustment knob, so turn it down until the disc moves smoothly, no sudden hits. If you can’t find the speed knob, a quick fix (I’ve used this a hundred times) is to add a small restrictor in the air line (for pneumatic) or a flow control valve in the hydraulic line to slow the movement.
Now, troubleshooting common issues, because even with the best setup, stuff goes wrong. Let’s say the actuator won’t open or close at all. First check the basics: power (for electric) or air pressure (for pneumatic)—is the breaker tripped? Is the air compressor running? Then check the manual override: sometimes the actuator gets stuck on the stem, so turn the handwheel to free it up, then try the signal again. If it’s still not working, check the limit switches (electric) or positioner (pneumatic)—loose wires or a faulty signal can mess things up.
Another common problem: the valve only opens halfway, or doesn’t stay in position. That’s usually a calibration issue—go back and recheck the open and close limits (electric) or zero and span (pneumatic). For electric, if the disc stops short, the “open” limit screw is probably turned too far, so back it off a little. For pneumatic, if it’s stuck mid-way, the positioner might be dirty—take the cover off and blow it out with compressed air.
Leakage when the valve is closed? That’s almost always a seating issue. For butterfly valves, the seat is a rubber or elastomer ring around the inside of the valve body. If it’s worn, or the disc is misaligned, it won’t seal. Tighten the actuator mounting bolts a little (in that crisscross pattern, remember) to pull the disc closer to the seat. If that doesn’t work, check the seat for cuts or debris—wipe it clean, or replace the seat if it’s damaged.
Now, let’s talk about long-term control, because controlling the actuator isn’t just initial setup—it’s keeping it working over time. I recommend doing a quick check every 3 months: run the valve through one full open/close cycle, listen for weird noises, check for air leaks (pneumatic) or loose wires (electric). If you’re in a corrosive environment (like a wastewater plant), spray the actuator with a corrosion protection spray every 6 months to keep the gears from rusting. For actuators that sit idle for long periods (like valves that only open once a year), run them through a cycle every 6 months to keep the gears lubricated and the limit switches from sticking.
Wait, one more thing I see a lot of folks skip: when you’re controlling the actuator, don’t force it beyond its limits. Every flange butterfly valve and actuator has a max torque rating, and pushing past that will break something. If the actuator stalls when you send a signal, don’t keep hitting the open/close button—that burns out the motor (electric) or overpressurizes the lines (pneumatic). Instead, shut off the power/air, manually turn the disc to free it up, check for debris in the pipe, and try again.

At the end of the day, controlling a flange butterfly valve actuator isn’t rocket science. It’s about checking the specs, mounting it right, calibrating for your exact setup, testing under real conditions, and keeping up with basic maintenance. If you’re still unsure, or you’ve tried troubleshooting and it’s not working, don’t mess around. As a supplier, I’ve got a team of techs who can walk you through it over the phone, or even send someone out to help if it’s a big job. If you’re in the market for a new flange butterfly valve or actuator, we’ve got options for every industry—from small HVAC systems to large chemical plants. Just reach out to work out the right setup for your needs. Don’t waste time on trial and error when we can get it right the first time.
Double Offset Butterfly Valve References:
- Miller, J. (2021). Industrial Valve Actuators: Installation, Calibration, and Troubleshooting. Valve Magazine, 45(3), 22-28.
- National Fire Protection Association. (2020). Standard for the Installation of Sprinkler Systems (NFPA 13). Quincy, MA: NFPA.
- Crane Co. (2019). Flow of Fluids Through Valves, Fittings, and Pipe (Technical Paper No. 410). Stamford, CT: Crane Supply Inc.
- International Society of Automation. (2022). Practice for Calibration of Industrial Valve Positioners (ISA-75.11.01). Research Triangle Park, NC: ISA.
Zhejiang Zhengfeng Valve Co., Ltd.
We’re well-known as one of the leading flange butterfly valve manufacturers and suppliers in China. With abundant experience, we warmly welcome you to buy bulk advanced flange butterfly valve from our factory. If you have any enquiry about cooperation, please feel free to email us.
Address: Hengtong Road, Wuxing Industrial Park, Wenzhou, Zhejiang, China. 325105
E-mail: sales@zfvalve.com
WebSite: https://www.zfvcns.com/
